Data Director Plugin
Using a data director plugin you can schedule data to be retrieved or pushed through the Integration Framework.
Use the information in the Installation Guide for Data Director 3.0 for instructions on how to install and configure it.
Creating a data director plugin
To create a valid data director plugin you only need to have a class in your solution that implements the ISchedulerAction interface located under the LSRetail.DD.Common.Scheduler namespace. The interface has only one method called Run(string arguments). This method will be automatically called by the Data Director when a scheduled job references this plugin.
Arguments
The arguments parameter is a string in XML format that must be deserialized. This will be populated with the name / value pairs of the parameters set in the job.
	public class MyIFPlugin : ISchedulerAction
	{
		public string Run(string arguments)
		{
			Dictionary<string, string> args = JsonConvert.DeserializeObject<Dictionary<string, string>>(arguments);

			string databaseServer = "";
			string databaseName = "";

			if(args.ContainsKey("DatabaseServer")
				databaseServer = args["DatabaseServer"];
			if(args.ContainsKey("DatabaseName")
				databaseName = args["DatabaseName"];

			if(databaseServer == "" || databaseName == "")
				return "Invalid configuration";

			// Perform desired operations
		}
	}
In the above example we deserialize the arguments and try to get a database server and name. If the configurations are valid, we can continue with our operations.
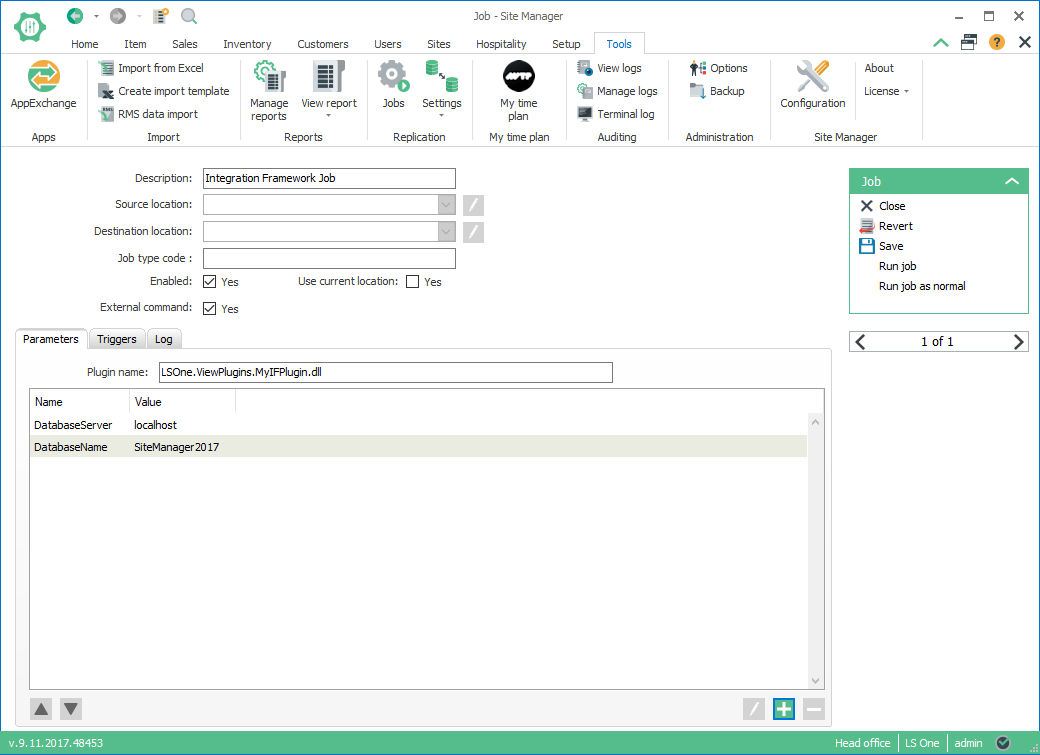
Setting up a scheduled job
To set up a job, open Site Manager and go to Tools > Replication > Jobs. Add a new job by clicking on the plus sign and enter a description. This will open the job view.
The first thing you need to do is to check the External command field to tell the job that it will run from a plugin.
After you check the external command you will see the Parameters tab. You will need to enter your plugin DLL name so the job knows where to look for the Run method that you implemented.
Lastly, but optional, you can set the parameters that will be received by the Run method.
After setting up the required parameters, you can access the Triggers tab and set when this job should run.

